Tuesday, July 17, 2012

Receiving the Best

This week has been super hot and dry-and as a plant lover-it’s been time-consuming for me to go out each and every night to water my garden. I was reading an article this week about how watering from a hose just isn’t as good for plants as rain water because it doesn’t contain as much nitrogen and hose water contains certain chemicals-yuck! I've even seen it work-my plants thrive on rain water. As a result, when I see it raining, I rush out there with as many pots and pans and try to collect this precious water. 
It got me thinking about God. Isn’t that just like Him? Even the droplets that come from His hand and fall from heaven are better than we humans can ever manufacture. We know this to be true about food as well. Humanly manufactured food is just not as good as God-grown food. He knows and creates the best. 
  Then I got to thinking then about my own life. So many times I think I know best, desperately trying to “manufacture” something out of my own strength. As humans, we settle for second-best or even for things that harm us (like some manufactured food) instead of taking what God offers. In my own life, there are many areas that I settle for "manufactured" goods:

  •  A friend confides to me and I give advice or try to help with my own ideas,
  • I wish to be comfortable, with no pain or hurt when perhaps that's not the best environment for growth...
  • I spend time with how I see fit, without taking into consideration how I should be serving Him.
 If I consistently started receiving what God was offering-how would my life bloom

I put a picture of this clover only has beautiful droplets, but also because it reminds me of our upcoming trip to Ireland. Yay! We leave Friday so I will be taking a break from blogging for one week....I'll bring back pictures though and you can journey along with us. See you next week!

Monday, July 16, 2012

Painting Stripes-the super easy way

Jesse (my husband) has done most of the renovation (because he is amazing). However, there are some rare spaces that I look on with pride because of my own sweat equity. One of those areas is my painted walls that the mom-in-law of all mom-in-laws helped me with :).
In our laundry room, we painted stripes on all four walls. Let me tell you, this was hard....especially trying to mathematically figure out how to measure the room and stripes so that the stripes ended on opposite colors. My easy tip is to just start measuring for your stripes and if they end up on the same color, remeasure one wall. Trust me, taking a quarter inch off of each stripe on one wall isn't going to be the slight bit noticeable.
When we painted the living room, there was a lot of yellow. I absolutely love yellow-mmmm...the rich buttery kind of yellow- but it was a lot of one color. So...while Jesse was away one day, I went about the task of painting stripes on the two opposite ends of the living room. It took me a total of about 5 hours to paint both walls. There I was-caught red-handed with my paintbrush and on my second coat when he arrived home. I loved the result (and he's admitted he does too) and have received a lot of compliments in the meantime. So...I thought I'd share what I did.

Materials needed: 
  • ribbon or string
  • pen/pencil
  • measuring tape
  • level
  • painters tape (I went with ScotchBlue Painter's Tape Delicate Surface with Edge-Lock)
  • credit card
  • small roller and paint

Step 1: Cut a ribbon or string the length of the longest wall you will be painting. Measure off and mark on the ribbon how wide you want your stripes to be. Mine were 5 inches. I didn't want them all to be the same width so I didn't take into consideration the tape. My tape was 1 inch wide. If I did want them to be the same width, I would mark them like this: 5", 4", 5", 4" and so on to account for the 1in. tape.


Step 2: Run the ribbon or string along the bottom section of the wall and tape it in place. I recommend it being about a foot off of the floor.


Step 3: Make sure the ribbon is level and adjust it so it is.


Step 4: Make a mark on the wall for each mark on the ribbon.


Step 5: Do the same for the middle and top of the walls, again, making sure the ribbon is level. You should now have 3 marks (bottom, middle, and top) for each stripe.
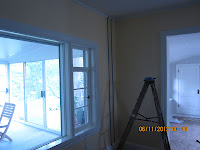


Step 6: Start taping. It's easiest to go from top to bottom, making sure to line up the tape with your three marks on the wall.


Step 7: Keep it going-the hard part's almost done!


 Step 8: Very important! Run an old card (like a credit card) and score each tape-line. Trust me, you'll be glad you did. Your paint lines will be as crisp as potato chips :)


Step 9: Start painting! Remember, only every other stripe and apply two coats.


Step 10: Wait a couple of hours (this was the hardest step) and gently pull off the tape. VoilĂ ! Just look at all that beautiful "stripedness"! And yes, Toto once again thinks he's the center of this photo. :)


Tips to making it easier
1. Use what you have. I didn't want to go out and buy more paint so I just mixed some of the yellow with the white I had on me. However, if you're mixing colors, make sure to make more than enough. Otherwise, you will never be able to mix that same color again. I have plenty left over that I labeled for future touch-ups.
2. Use colors on the same spectrum. I had a friend who painted beautiful stripes using slightly different colors but then alternating shiny with a more flat sheen. The look was beautiful!
3. Again, don't worry if you have to adjust a few of the stripes. Having 125 year-old walls makes them as curvy as a sinusoidal function (sorry-my mom's a math teacher)! Nobody will notice a quarter inch difference. And, if they do, you need to throw a more entertaining party. Guests should not be examining your walls for hours on end. 


Do you have a painting story? I'd love to hear about it. Leave a comment or email me!

Wednesday, July 11, 2012

Easy Dry-Erase Calendar

You know when you have something in mind that you want, but just can't seem to find it or are not willing to dish out the cash for it? Make it! I wanted a calendar that would be dry-erase and let the color of my striped walls show through. This is a super easy dry erase calendar.
1. Purchase a floating frame-the kind with two pieces of glass that you can stick photos, paper, anything in-between. I purchased mine from Jo-Ann Fabrics for $12 with a coupon.
2. Cut out 42 circles or squares. I made mine from a punch.
3. Take 7 punch-outs and place the letters "S,M,T,W,T,F,S" on them.
4. On one piece of glass, arrange your calendar. *See photo
5. Place the other piece of glass over top and place in frame.
6. VoilĂ ! You have a beautiful dry-erase calendar that you can write on with dry-erase makers!

Tuesday, July 10, 2012

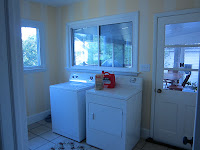
The Laundry Room-after

Surprisingly (and you're going to laugh) the laundry room was relatively easy (that is-compared to the kitchen). Yes, we....
removed walls,
flooring,
ceiling,
put in new electric and drywall,
leveled the floor with cement,
tiled the floor,
painted walls with stripes and then
painted trim...whew!
But....all in all, it was a pretty basic reno.


It's coming....We did replace the windows and that made a huge difference! Not only do we not feel cold air blowing in, but the new windows look huge!


 I absolutely love stripes! After many failed attempts to mathematically calculate it, we went ahead and painted and I love the effect! To see more on painting stripes, click here.

Remember that old paneled closet in the previous picture? Well, it's gone and in it's place is more space and a "do it yourself" dry-erase calendar. to see more pictures of the calendar, click here.


Ahhh....so fresh and bright. It almost makes doing laundry enjoyable. Almost.

The Laundry Room-during

In this particular house, the laundry room space became huge after we took out the paneled closet in between the kitchen and the half bathroom. This is good. It's nice to have more area than you actually need for rooms like these because we can store our little Toto's crate in there and have room to fold clothes. In our old house, I could not open the door to the laundry room and open the dryer door at the same time. It was a balancing act of squeezing in there, closing the door, and then opening the dryer door to remove clothes. Those days are long gone....ah. But anyways, here is a picture of the walls, floor and ceiling apart.

And here is a picture of the green tiling removed with the washer and dryer once again moved into place. The washer and dryer, like many of our appliances became moving vehicles it seemed. There were many times we wished they would just sprout wheels! Oh, and you can even see the little dolly made it into this picture, so in a sense, they did grow wheels!

The Laundry Room-before

With the laundry room, let me first start by saying how blessed we are that our laundry room was upstairs on the first floor. We had looked at other houses where the laundry room was in the basement and we were wanting to move it upstairs. After dealing with moving kitchen plumbing around, I am so thankful that we did not need to run any laundry room plumbing. Here is a before shot of the laundry room:


Here's another shot from the other direction looking into the old kitchen and bathroom. The big "paneled" thing in the middle is actually a paneled closet. The benefit of a renovation is that you can completely change things around. It's amazing what you can think of if you have a little creativity. One of my favorite slogans has become: Where there's a will, there's a way. We didn't like the closet...so we took it out.