Tuesday, December 31, 2013

Upstairs

This post is all about stairs-we love them, we hate them, especially walking up and down them numerous times.
But....did you know you can get really creative with your stairs? It's easy to forget these little guys when our feet are the only ones to make contact with them but it's really simple to make them stand out.

When we first moved into our our auction house, here is what our beautiful stairs looked like:


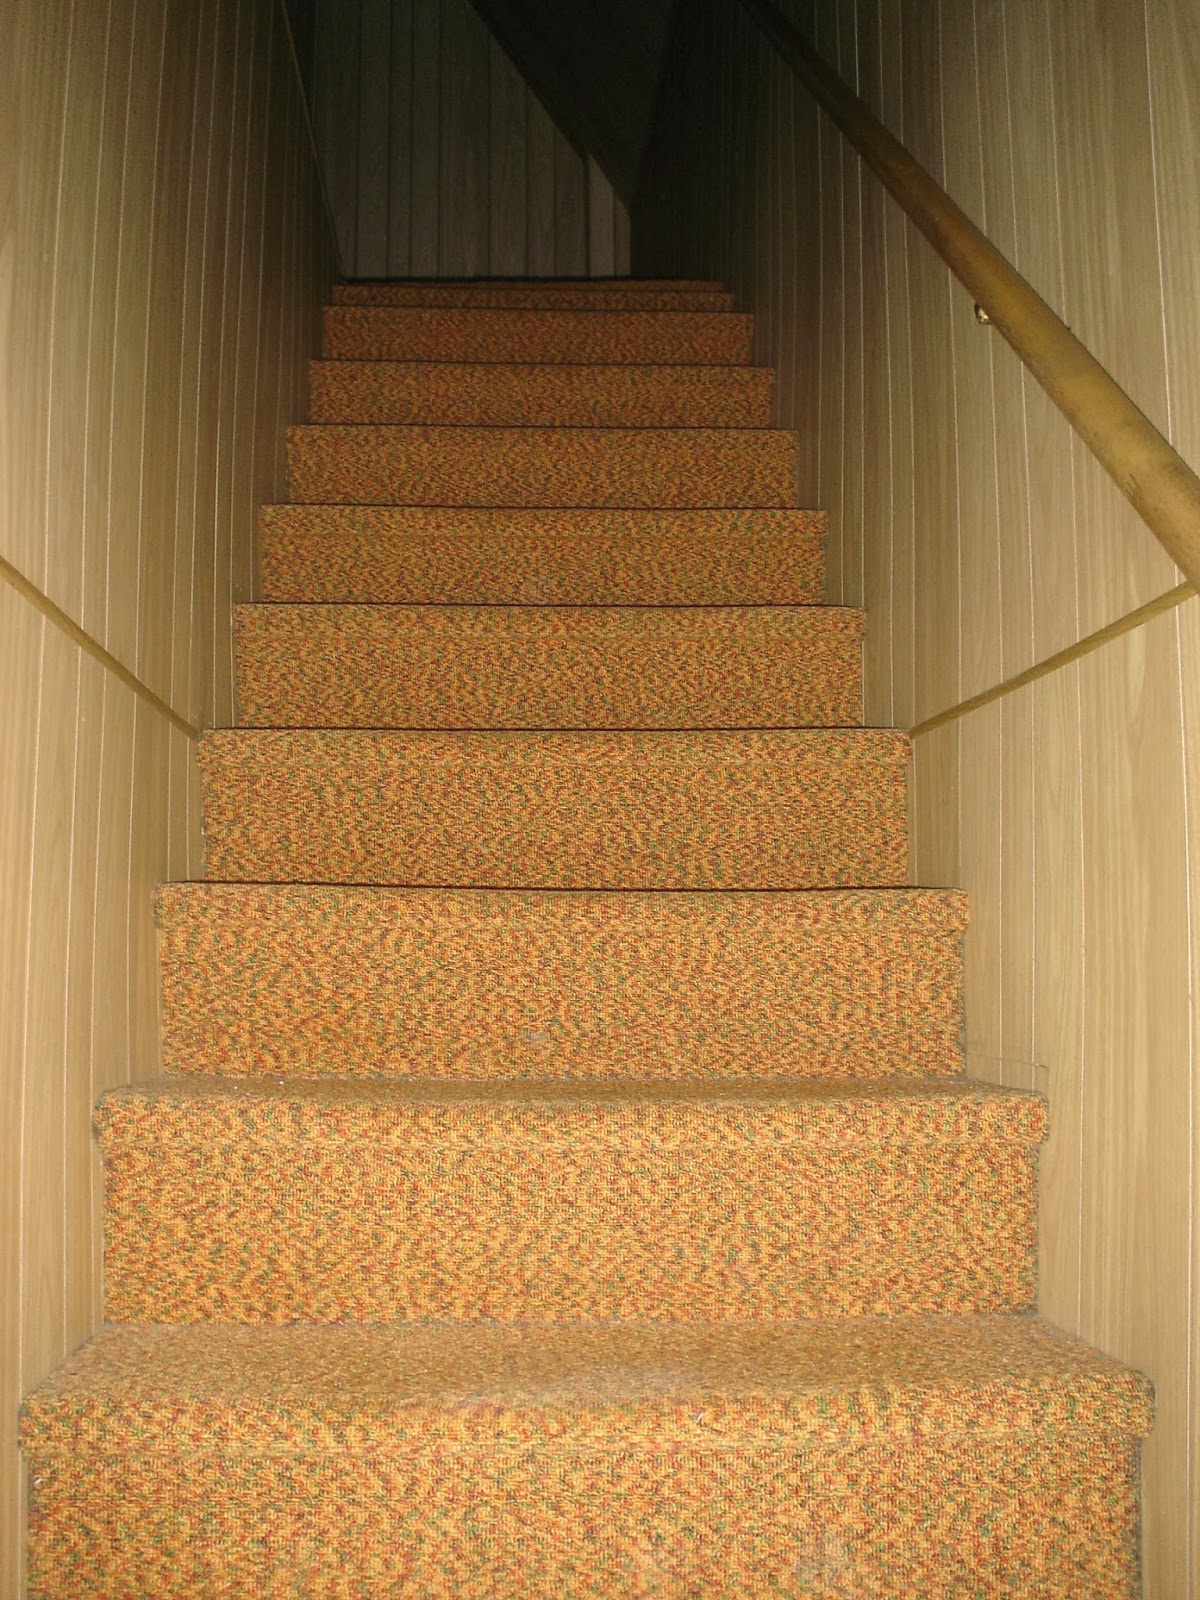
These little guys were way past their due date for a face-lift. The orange-speckled carpet that once probably did a decent job of hiding dirt was no longer functioning and the middle part of the stairs (the part that people use) was worn thin.
And please, can we just talk about the tunnel of dark paneling for a moment? At one point during our renovation, I thought we could open our house up as a haunted house and charge people for visiting. This stairway would definitely elicit some screams.
I personally don't like wood paneling but know a lot of people do. If you are one of these people, please don't install dark paneling in close spaces with minimal light. You will be doing all of us a favor by not installing a safety hazard.

The top of the stairs were no better. Even the banister was wrapped in paneling, making for a sort of scary optical illusion. Still dark. Still creepy. And I bet if I would have jumped out in a Frankenstein outfit, you would have screamed.   Loudly.


So what's a couple to do? Initially, we were just going to paint the paneling (which I am a fan of) and install new carpet. However, one of our amazing neighbors works in a wood factory and had some "scrap" maple wood treads that, if he didn't find someone who wanted them, was going to add them to his burn pile. By "scraps," I mean these treads looked absolutely perfect to me. Perhaps to the very careful eye, they could have spotted a nick in a few but we didn't care-they were beautiful (and free!).

So....we Jesse took the long route and decided to rebuild the stairs and install the new treads.

Before I start this description, let me add a disclosure. Jesse could probably tell you much more in detail how to install stairs. If you're interested, just contact him and he'll share the details...probably more than you bargained for!

First, he took the old ones apart and rebuilt the risers (that little box that you see).


He also built in additional support for this large stair before placing the tread on:


Next, he built a little ledge to prepare for the next riser:


And...voila! two stairs completed!


Can you already see how this is going to lighten up that creepy stairway?

It was still missing something though....I had always imagined the fruit of the spirit verse if we had wood stairs. Now that we had our wood stairs, I went searching and found this decal on etsy:


The thing I love about wall decals is they don't have to stay in their original position. They are usually sold on clear backing, so cut them up and change their shape! Have some creative fun with them!

After painting the paneling and having fun with the decals, here is how our stairs look now:
And...it provides a great reminder of the qualities I should be displaying!


Jesse also rebuilt the banister to make it much more open at the top of the stairs.


Yay! Much less intimidating! Now, I can just have you over as a guest, not as a haunted house customer! =)


Monday, April 1, 2013

Master Bathroom

When we first moved in, we had one full bathroom and one half bathroom. We closed off the one full bathroom to make a master suite (kind of like a safe haven for us).

To give you an idea of the layout, you had to walk through this hallway to get to the one full bathroom:

Once you arrived, things went from bad to worse...


Let's break this down:

  • dark blue wallpaper
  • teal carpet-yuck! Carpet should never be in a bathroom. This stuff was quick thick and we probably had a few mushrooms growing under it. Moisture and carpet do not mix. 
  • the famous Allison pineapple lights. These light fixtures were quite popular with my friends who came over. However, beauty is in the eye of the beholder. Someone bought them from us on Craigslist, which made Jesse and I very happy =). 

Here's what we did:
We peeled off wallpaper and patched up the drywall.


We closed off the door to the bathroom and instead made a new entrance from our bedroom. This made it much more "master suite like." 
We also tore out the carpet (ahhh....)and vanity and instead added tile. 


And here's what our little place of solace looks like now:


So much cleaner and brighter =).

Saturday, March 23, 2013

Master Bedroom

I am finally ready to write about our master bedroom! Look at the date from the last time I posted. This lapse in time equals "it takes a while." My advice for anyone thinking of starting a renovation-
1. Figure up the amount of time you think it will be done and the amount of money you think you will spend.
2. Then multiply it by 5.

You'll be much more accurate if you use this little formula. However, after all the waiting, it is definitely worth it. You receive the character and well-structured support that comes with an old house and the "newness" and choice of design that comes with a new house. A win-win! As long as you're patient....

Take a tour with me and see the progress on our master bedroom. We did some changing of spaces (i.e. took out walls) which can sometimes make it hard to see in pictures.
Let's start at the beginning. On the day we moved in, the hallway to the master bedroom looked like this:

If you went to the left, you would enter the bedroom. Straight ahead is the only full bathroom in the house. And... on the right are some built in cabinets. Here is what we decided to do:
1. Take out the built in cabinets (which gave us a much bigger hallway).
2. Build a wall in-between. Now the only full bathroom will be accessed through the bedroom making it a master suite :-)
3.On the end closest to where we are standing would become a little coat closet (since it is close to the front door).

4. On the end closest to the bathroom would become a walk-in closet.

5. Build another full bathroom directly above this bathroom upstairs.

Yikes! Let's get started!

Okay, now that we've established how the space changed, let's go back to the bedroom. Here is what the bedroom looked like the day we moved in. It was complete with all my favorite things :-)
1. Gray paneling
2. Drop ceiling
3. Old teal carpet
4. Dark painted, awkward closet.


Here's a better picture of the closet.


So...we did what is starting to come natural to us: We ripped out everything.


This was about the time that we also ripped out the living room. We had a dumpster at the time so we thought we'd kill two birds with one stone.
You can almost see through the whole house! And...Jesse was doing some duct-work at the time. Can you spy him?


Here's me, complete with goggles and work boots, pulling out nails (I've very talented at this job, in case you didn't know).


Looking back at these pictures makes me wonder how I ever survived. A healthy dose of humor will get you through a lot!

Finally, around Christmas, we had drywall put in.

 
And here's the new opening to the bathroom!


Surprise! Guess what we discovered under the old carpet? A beautiful hardwood floor! Jesse and I just love little treasures like this and it continues to be one of my favorite parts in this house. We discovered that this bedroom used to be a living room. If only wood floors could talk! I bet they would have lots of stories to share about the conversations they heard over the last 100 years!


Once again, Jesse's mom comes to the rescue and sands down the hardwood.


And then we stained it a beautiful dark color. 


Isn't it lovely?! Wood is an amazing material. It can be 100+ years old and be made to look as good as new. Don't we all wish our skin could do the same?


Now, we are finally moved in and loving our space-we actually feel like we're in a hotel! I've never had a first floor bedroom but I've discovered it's very convenient, especially having our own little bathroom attached to it.


Thanks for coming along with me!

Thursday, January 10, 2013

Half Bathroom

There's something wrong when you feel you are being spied on in your own bathroom. This is how I felt initially in our half bathroom. The wallpaper in the room had hundreds of squirrels and birds-which equals hundreds of eyes....
Before:


There's another thing in this bathroom that, personally, I don't care for: drop ceilings.  I have two problems with them:
1. I just don't like the look of them in my house. Drop ceilings are easy and fine in basements and other buildings-I just don't care for them in the main living parts of my house.
2. I'm leery of what's above them. We torn one down and found a dead bird in-between the ceiling and the drop ceiling. Since then, they've scared me.

So...the wallpaper, floor and drop ceiling had to go.


 Eeewww....I'll admit it-I'm a little embarrassed of this picture. I mean, the floor looks sooo gross. But, that's just what a floor looks like when you remove laminate flooring, I guess. And...we're close, right? So I'll let you into my gross little bathroom :-)

I went completely bold with the color. Usually I prefer whites and very light colors but chose a darker green. I'm liking the result :-)


If you're wondering what the area next to the toilet is, it is a closet. When we dug up the flooring, Jesse discovered that it used to be a shower. We knew we were already building another full bathroom upstairs (and it would be a lot of work for a tiny shower) so decided to keep it a closet.


Finally, we tiled the floor and put in an adorable little pedestal sink and new toilet lid.


Aahhh...now that's more like it. No more eyes.